Clients can mass upload a list of their leads to their IRIS CRM site using the built in Lead Importer tool.
Leads can be grouped by Campaign, Lead Source, Group and Status State during the import.
Pre-Import Preparation:
Prior to importing a lead list is a great time to make sure that your Statues States are configured to match your account life cycle.
Check your currently work flow and make changes by visiting Manage -> Administration -> Manage Lead Status States.
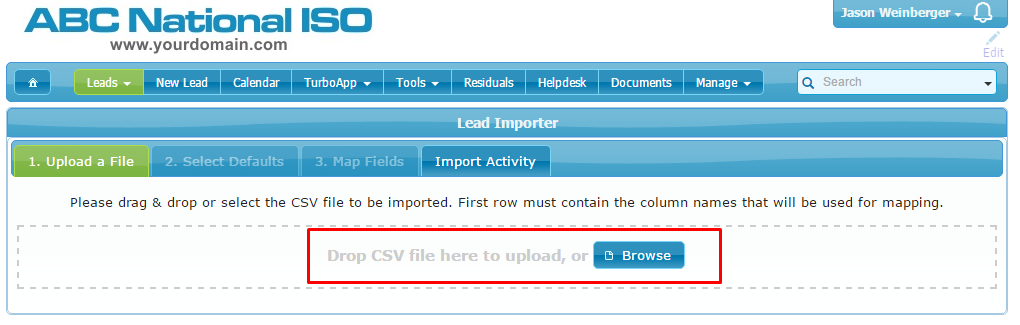
To import a lead list for your sales reps to begin prospecting, first start by having the your lead list re-saved in ".CSV" format.
The Lead Importer tools allows you to put the leads into their current state in the sales funnel at the time of the import.
For example, if a lead is currently in "Appointment for Presentation Set" status, you will want to set the lead to this status state.
If you have a category called "Qualifying" and a status called "Inbound Leads" only the status state "Inbound Leads" is required in your file.
In a case where you need to change a lot of status states, you can do a Find & Replace (Ctrl + F) in Excel to put in the updated status names.
If all Status States are going to be the same for the leads being imported, you can delete that column from your spreadsheet and simply pick the status in Step 2 below.
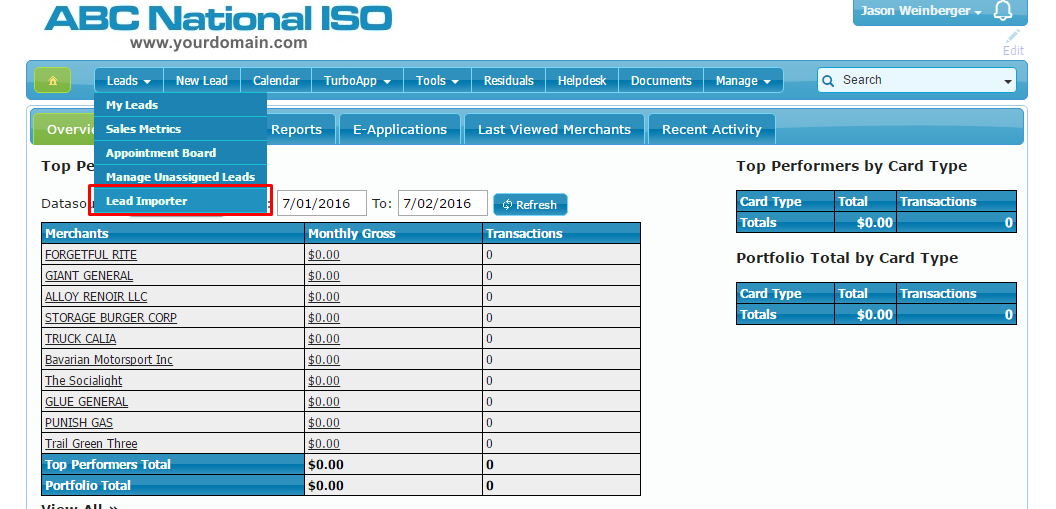
After you have your CSV file, navigate to Leads -> Lead Importer:
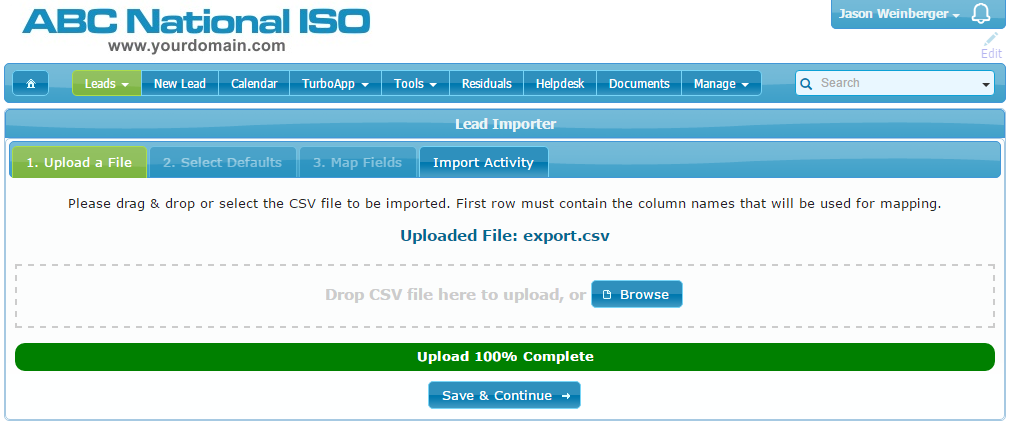
Step 1: Select the lead list you would like to upload which must be in CSV format:
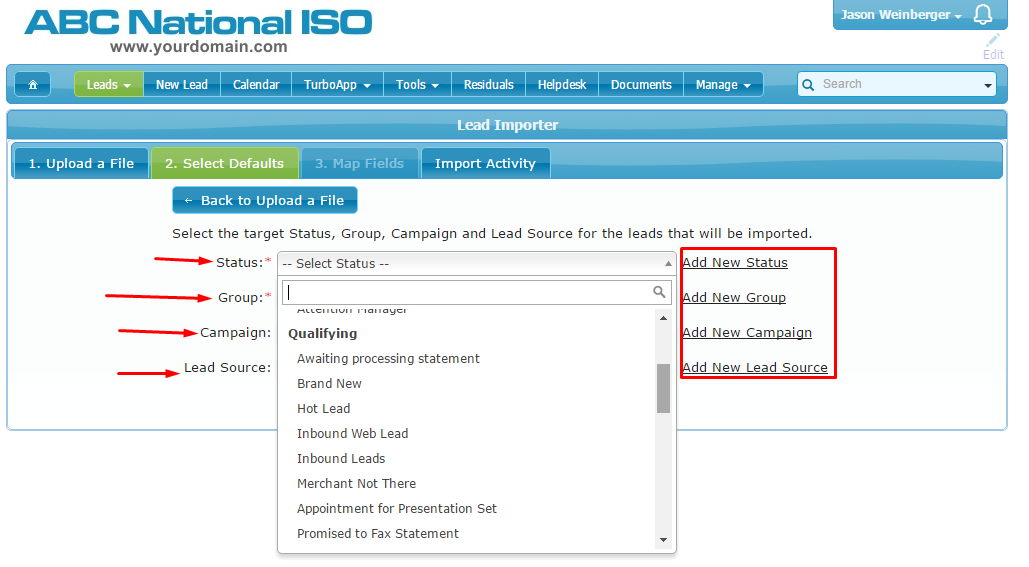
Step 2: Set the lead list attributes:
Choose the default tags that you would like these leads to contain such as Status State, Group, Campaign and Lead Source.
You can also easily add new Status States, Groups, Campaigns and Lead Sources right from this screen and apply them on the fly.
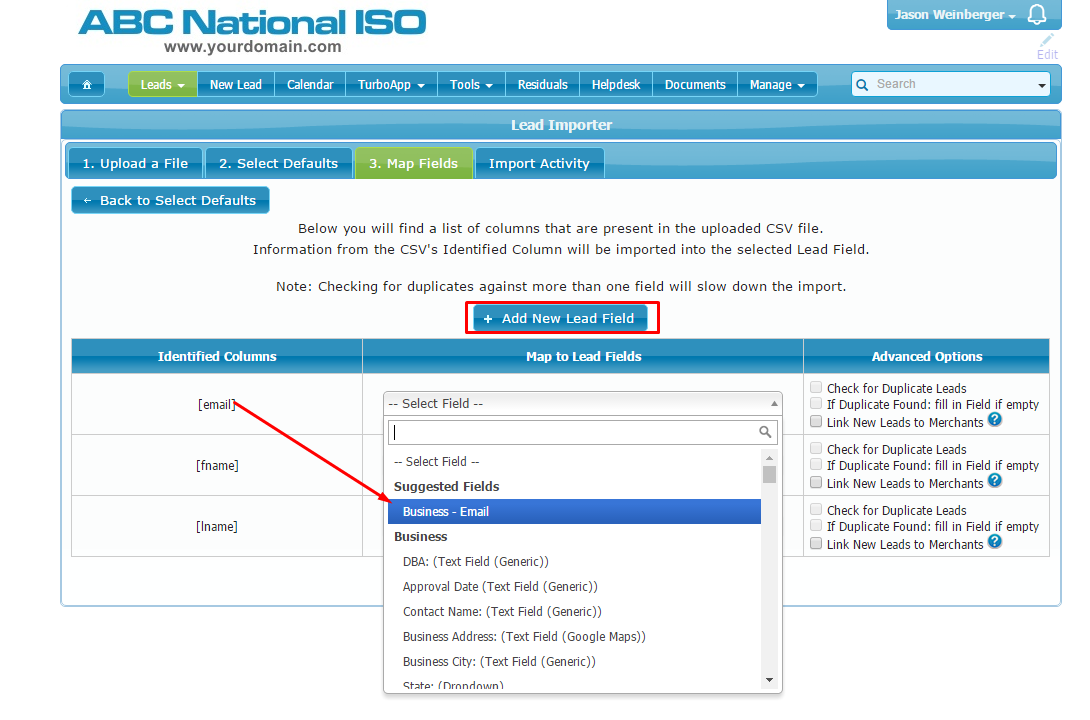
Step 3: Map the columns from your file to the corresponding Lead Fields:
For the columns that do not have a matching field you will have a button that says "Add New Lead Field" at the top of the page, and you can add the field right then!
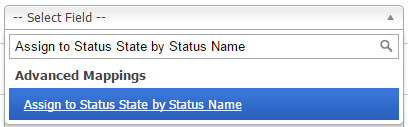
If you kept the Status column in your file you will see an option near the bottom of the mapping list that says "Assign to Status State by Status Name":
This dropdown tells IRIS CRM to find the Status State by the exact spelling in your file. It is important to leave off the quotes!
If an exact match is not found, the Status State that was selected in Step 2 will be used.
Here is what it looks like to set the Status mapping:
Step 4: At this point the import is ready and you can click on the green "Start Import" button:
Once all the lead setting options have been mapped, an import can be started from the Import Activity page.

Step 5: Wait for the job to complete.
The lead importer runs every 10 minutes, but you do not have to stay on the page and wait. IRIS CRM will send you an email when the Lead Import is done.
Next week we will talk about how to mass assign these leads to your users!
![]()
For questions regarding this feature or any others please contact us or email support@iriscrm.com
For electronic payment breaking news, feature releases and industry developments, please subscribe to the IRIS CRM newsletter.
