New and Enhanced Helpdesk
We have released a new, enhanced version of our internal Helpdesk tool!
Besides some great visual enhancements and speed, we have also added the ability for merchants to open tickets directly through your portal.
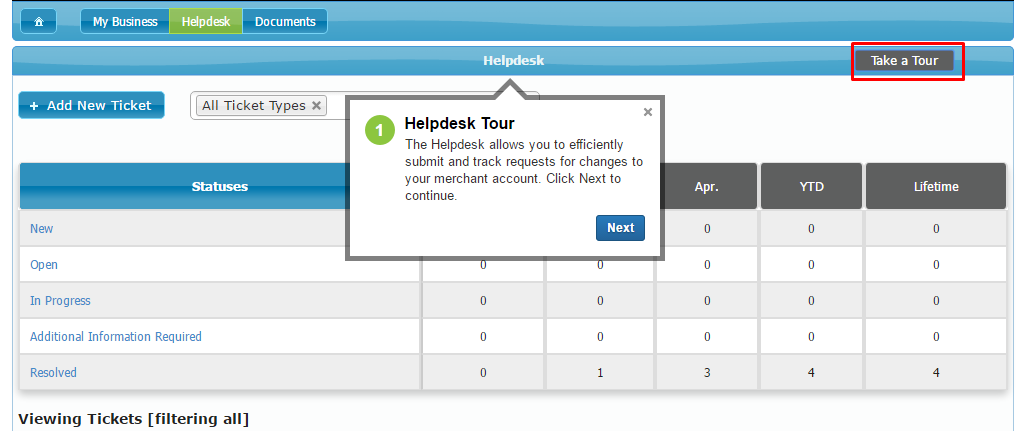
Merchants and your staff can learn about the new Helpdesk by pressing the Take a Tour button at the top of the page.
Access to the Helpdesk in your IRIS CRM site is a great value-add in addition to the daily deposit, chargeback, and retrieval notifications merchant already can receive because they can communicate with you without needing to call in.
The merchant can quickly open a ticket and receive updates on the progress of an issue within the site. When you reply to them with an update, they'll also receive an email with the details. The overall merchant experience is strengthened and their level of "stickiness" to you is increased.
There are also more filters and flexibility built into the Helpdesk Dashboard.
Below we will walk you through the new enhancements to the Helpdesk.
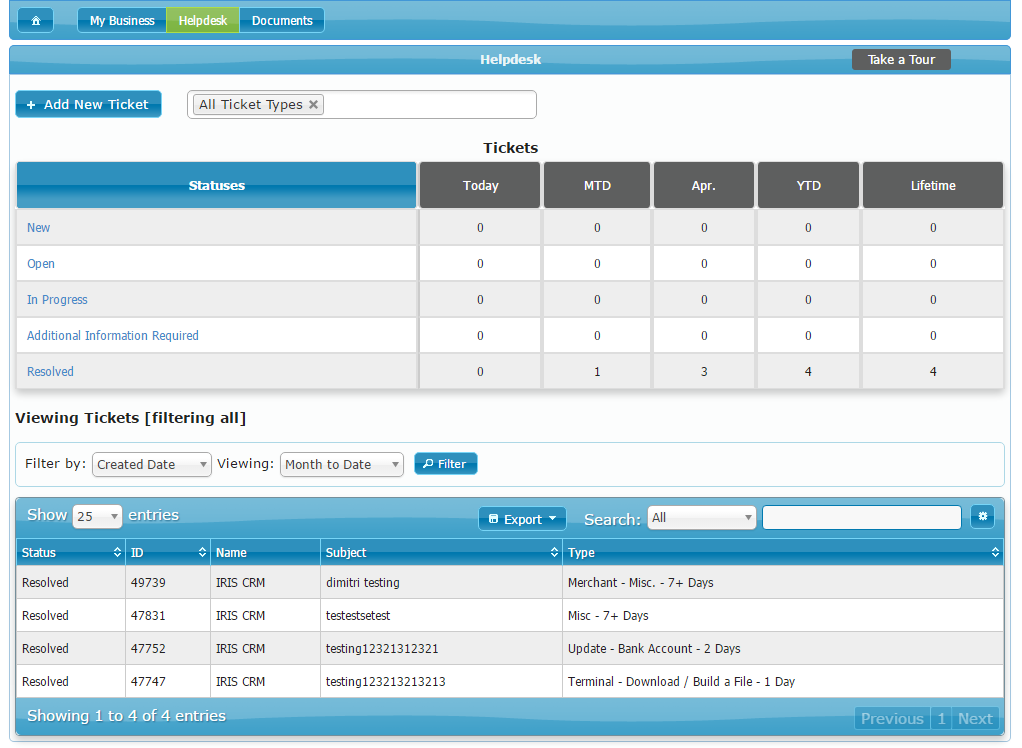
Take a look at the beautiful new UI:
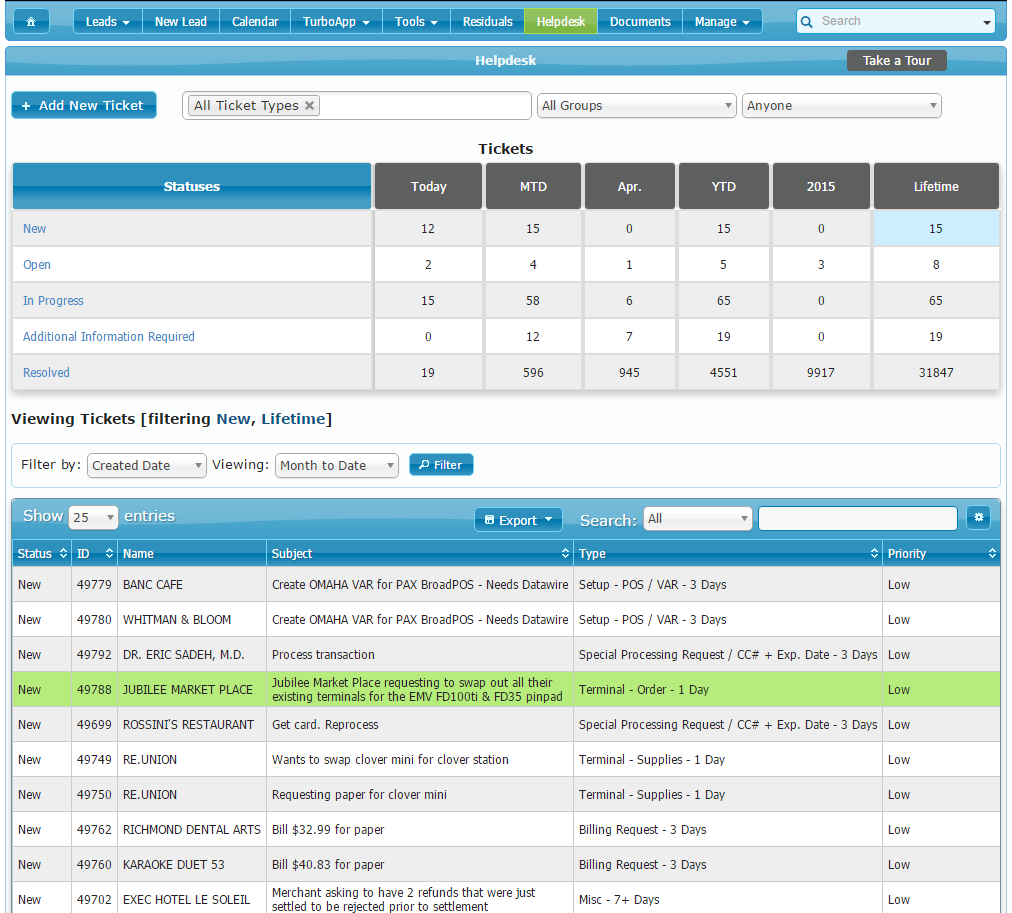
Tickets in the status of "New" will be shown as the default view when the page is loaded. You can tell the tickets that you are currently looking at by the blue background displayed in the active cell:
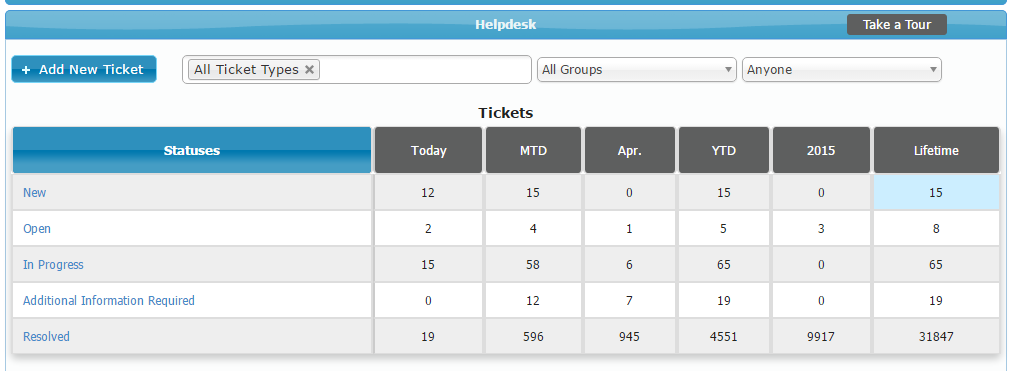
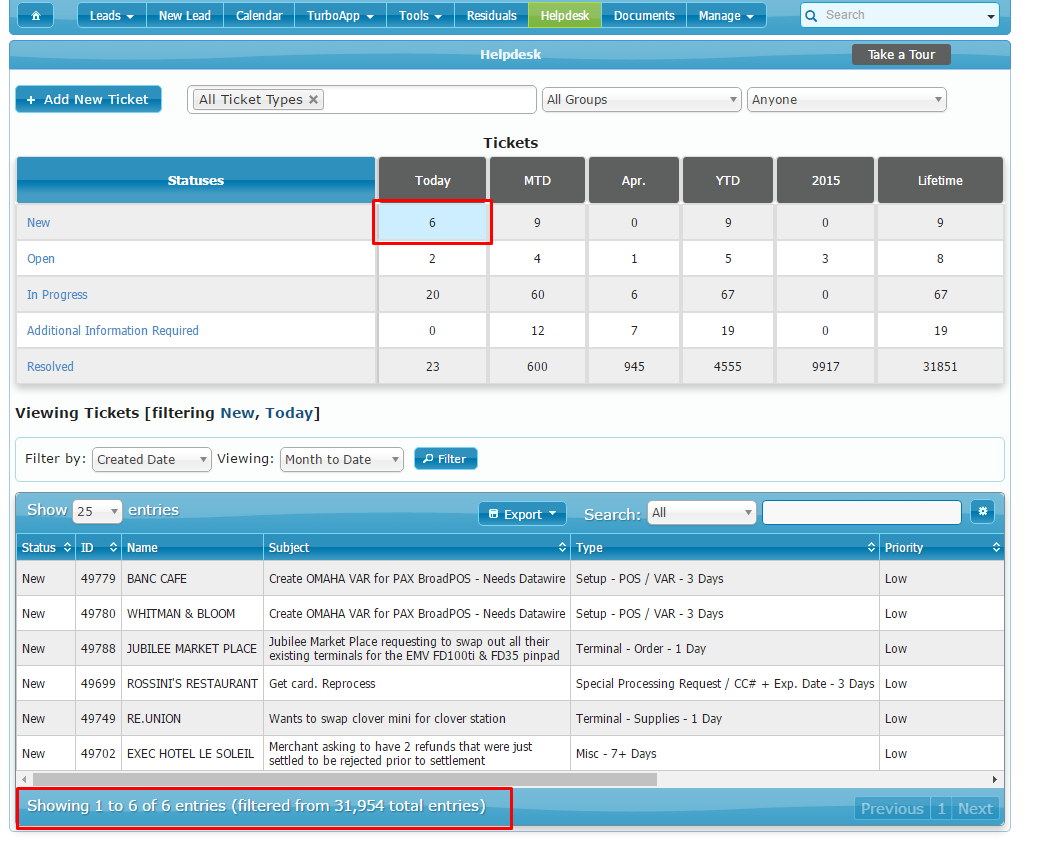
In the gray boxes, you will notice cells that indicate date range filters. When you click on a cell, the tickets that fall under the status and time frame will populate in the table below:
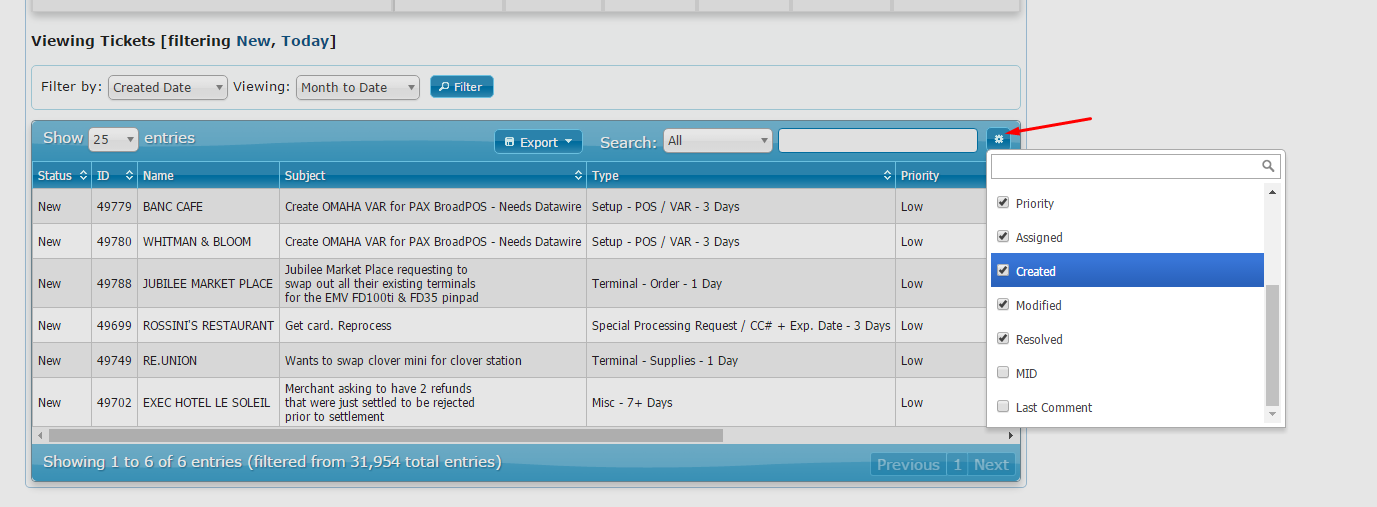
You can further customize your Helpdesk experience on a per user basis by adjusting the visible columns. To toggle the visibility of specific columns, simply click on the cog at the top right of the table and select the columns that you would like to enable:
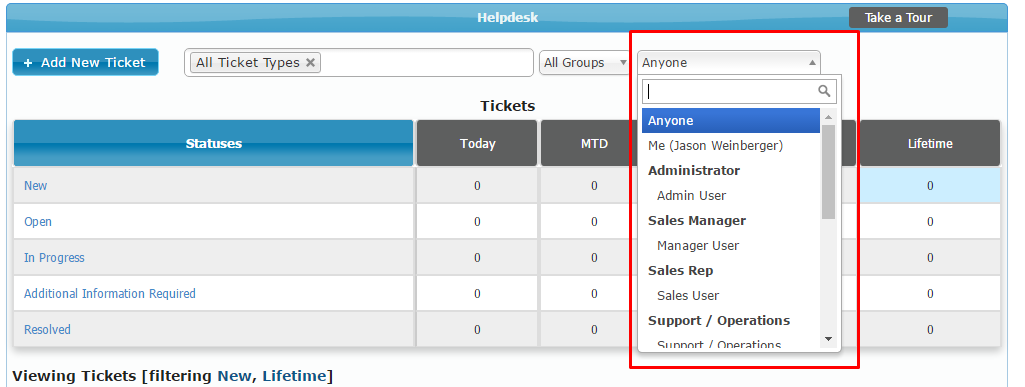
If you would like to see all tickets that were created, modified or resolved by a specific user, we made this possible through a user-selection dropdown:
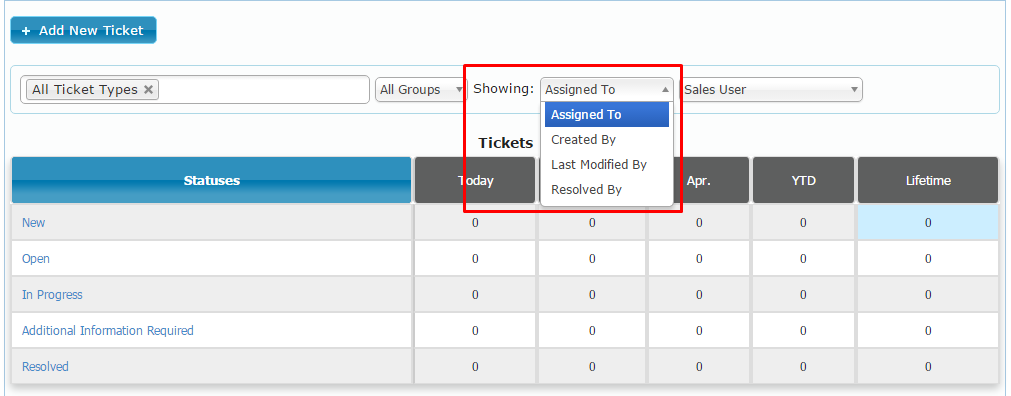
We also added a secondary filter for sorting tickets by user with four new options:
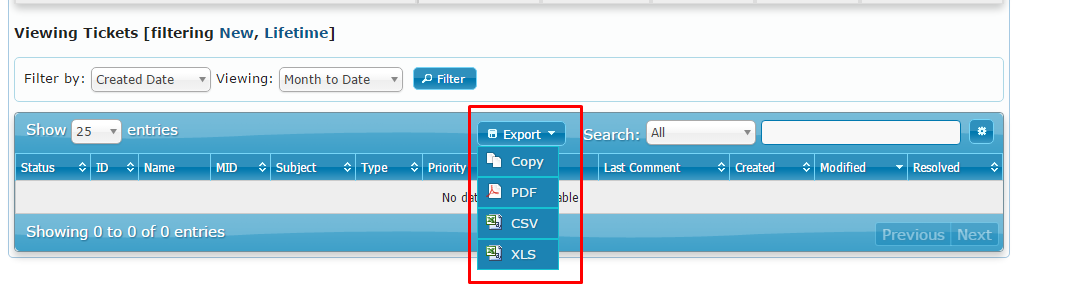
You are now able to export Helpdesk ticket data! Click the "Export" button and select the appropriate file type to receive a filtered ticket report:
Merchants can interact with the Helpdesk as well! Make sure to mention this new added value to your current and prospective merchants!
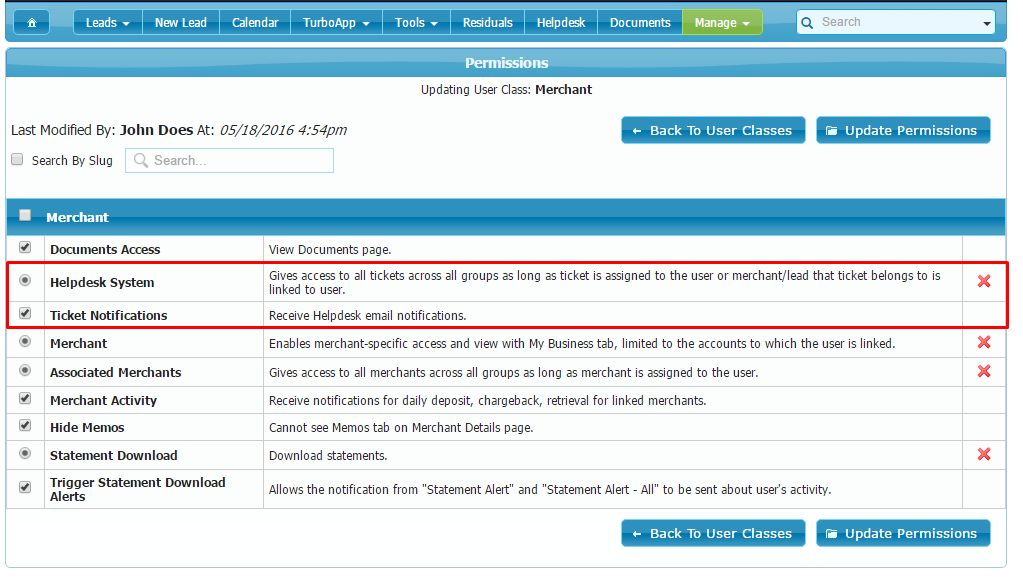
To enable the Helpdesk for your merchants, go to Manage -> Administration -> click "User Classes"and click on the "Permissions" button next to the Merchant user class.

You will now see two new permissions that will enable access to the Helpdesk for your merchants. Select the "Helpdesk System" radio button to turn on the Helpdesk for merchants and check the "Ticket Notifications" box if you want merchants to receive email notifications with ticket updates for tickets that merchants have access to. You have to specify which ticket types merchants have access to which we will explain how to setup below so please keep reading.
In order for merchants to be able to submit tickets, they must have the visibility permission enabled.
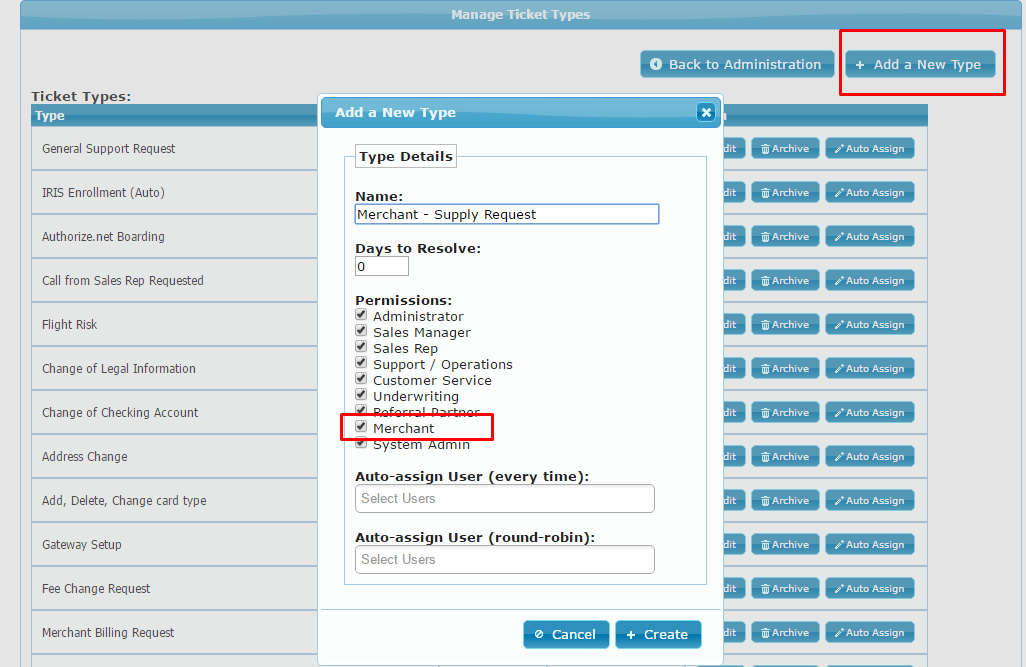
To enable the Merchant user class to submit tickets, navigate to Manage -> Administration -> "Manage Helpdesk Ticket Types".
Click on "Edit" to bring up the permissions of which user class can see which existing ticket type and select the "Merchant" check box. Adding a New Ticket Type is also done from this page:
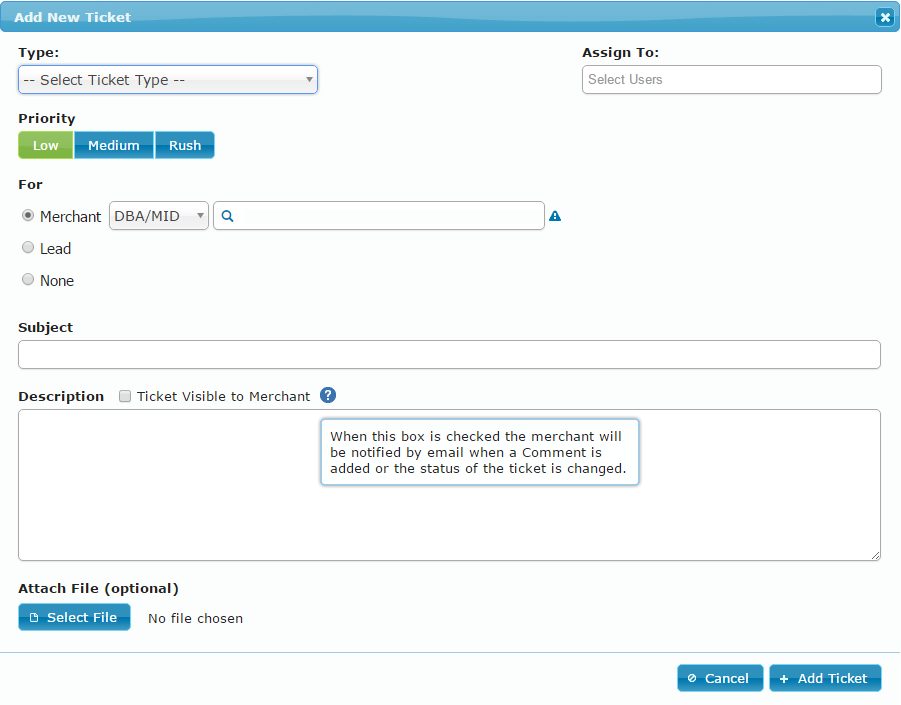
Tickets can also be made visible to merchants on a ticket by ticket basis. When creating a ticket, you will see a new check box next in the Description section that toggles visibility called "Ticket Visible to Merchant". By checking this box, merchants will notified by email when a ticket is created, changes status or a comment is added:
Once you enable Helpdesk access for the Merchant user class, the merchant users can begin submitting tickets. Here is what Merchants see when they log in.
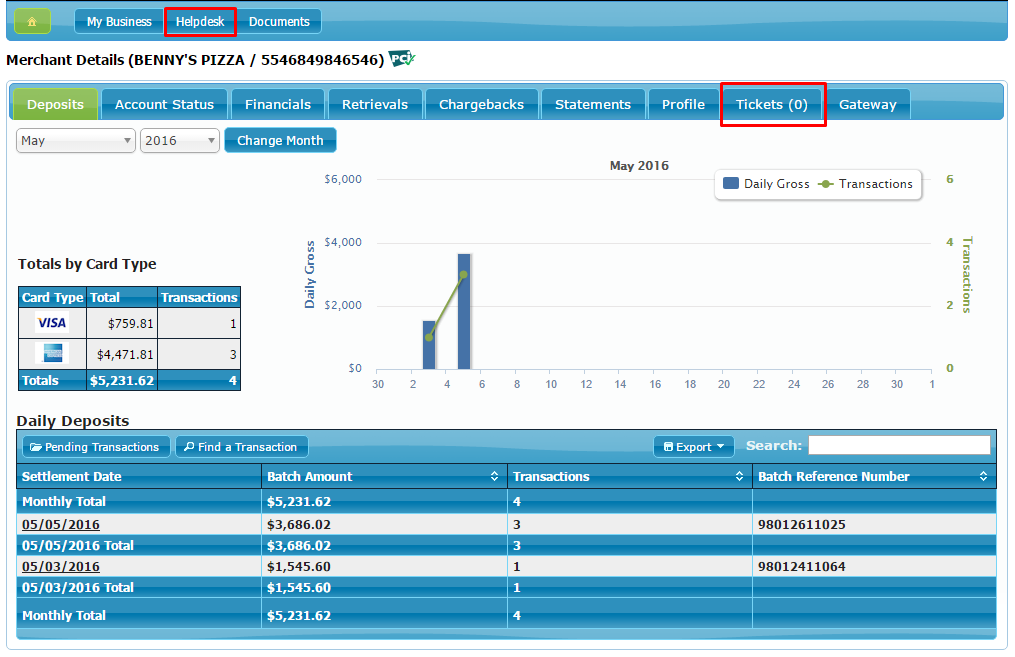
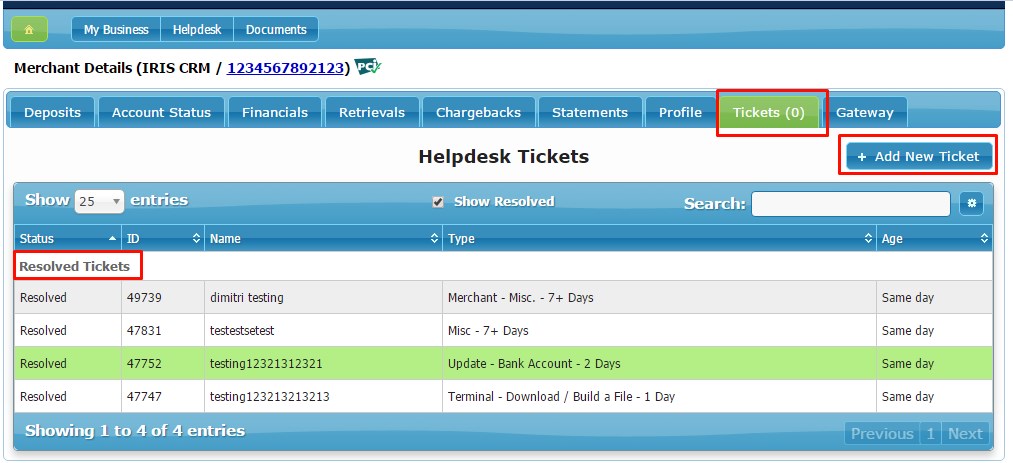
Merchants will now see a Helpdesk button in their navigation bar as well as a new Tickets tab:
When they click on "Helpdesk" they will be taken to the Merchant version of the Helpdesk dashboard and they will able to see any issues they currently have set visible to them.
They will only be able to open tickets with the ticket types you have made visible to them following the directions above. If you have questions or concerns about the setup process, email our support desk at support@iriscrm.com.
Filtering Tickets (Merchant View):
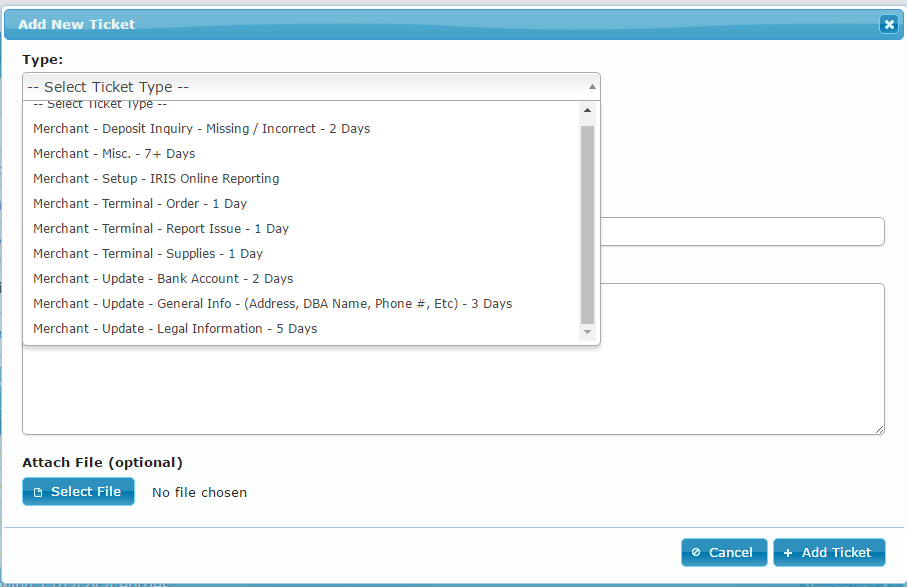
Submitting A New Ticket And Uploading A File (Merchant View):
Merchants that click on the new "Tickets" tab in their portal will see an overview of any open and resolved tickets tied to a a particular account. Merchants can add a new ticket directly from the Tickets tab as well:
You can also instruct your merchants and staff to click on the the "Take a Tour" button and they will be taken through a great step by step over view of the new Helpdesk!
![]()
For questions regarding this feature or any others please contact us or email support@iriscrm.com
Stay up to date on our latest features. We will be posting about a new feature every week!
For electronic payment breaking news, feature releases and industry developments, please subscribe to the IRIS CRM newsletter.
